With 80 years experience in all things camping, caravanning and holiday home related, Ladram Bay know a thing or two about what makes our holiday park accommodation special. However, we thought we’d take a step back and ask a higher authority about what goes into making a holiday home and where better to start than the source – a holiday home manufacturer.
We’ve found interviewing people at Ladram that over the years holiday lodges provide the backdrop to some of their most cherished memories. They become part of the family, a meeting point for families that are scattered around the county for much of the year.
The folks over at Victory Leisure Homes put roofs over the heads of plenty of our loyal residents so we asked Victories managing director Peter Nevitt for some insights into the process of building holiday lodges.
The floor plan drawing you sent us (above) looks great, is this a classic design that is tweaked each year or do you start with a blank canvas each time?
When introducing a new model we start from a blank canvas but once a model has been successfully launched it will just receive a few model tweaks each season
How long does a lodge take from design, manufacture & delivery?
This varies from model to model but on average about 16 weeks for the development model, thereafter it takes about 4 weeks.
How many people does this involve?
Currently we employ just over 100 people across two production lines, one for lodges and one for static caravans.
How many countries do you sell in?
We currently deliver units to Spain, France, Belgium & Germany.
Where’s the furthest afield you’ve sold to?
The South of Spain
If shipping abroad is done, are the homes delivered flat packed and constructed upon arrival?
All lodges are delivered as completed units, lodges are delivered in two parts and then put together on the park
Do people specify their own floor plans? (if yes) what is the wackiest idea that someone has requested from you or do they simply choose around a size & then the number of rooms?
We produce standard models with set floor plans so changes are very limited and generally very expensive.
What is the hardest part in the leisure home manufacture process?
With well over 100 years production experience within the team we have removed the difficult production areas.
Are any markets more demanding than others?
Some countries have their own specification such as gas pipes and electrics but we take these changes in our stride.
What is the most striking or unusual location a Victory leisure home as been placed in.
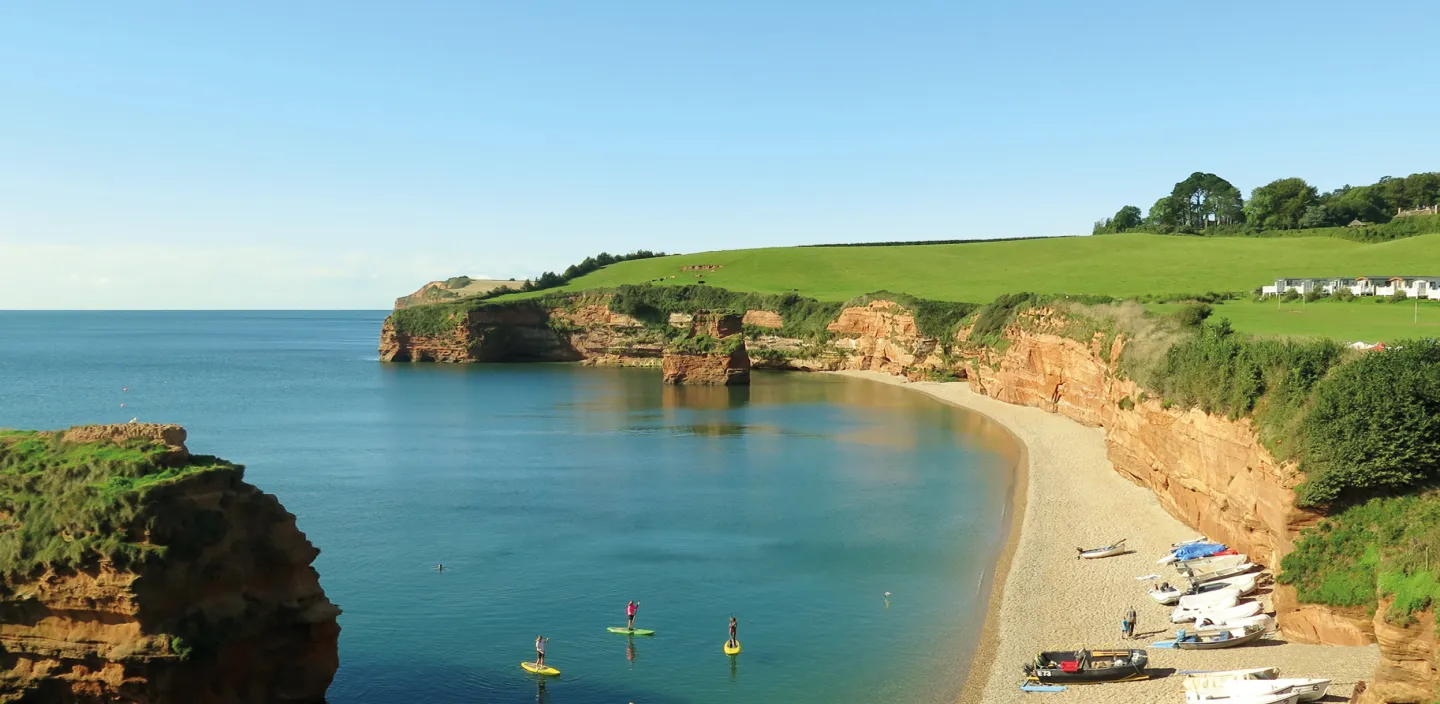
The views from the new development at Ladram Bay have to be some of the best that I have seen during my travels around the country
What is the biggest difference from designs that might have been around in the 80’s & 90’s?
Over recent years units have increased in size which has enabled us to introduce utility rooms, separate shower rooms and bigger bedrooms offering more comfort.
Are there any materials that have changed the way lodges are designed?
The traditional static caravan is still made from aluminium but we are receiving more and more requests for soft vinyl or canexel
Do you have any industry facts about UK leisure home ownership, numbers, facts or trivia?
Some model trivia that will surprise is that in one lodge caravan we use about 480 metres of electrical cable, 8542 component parts, and 1500 metres of timber.
Is technology changing the way you design and manufacture lodges?
No, by the very nature of the product it is for holidays and customers seem to like having comfort without the technology, such as USB ports or phone chargers.
Are the Victory team big leisure home fans themselves outside of work?
Quite a lot of our staff do book holidays with the family on parks around the country
Where was your first leisure home holiday & when?
My first leisure home holiday was in the South of France back in the late 70’s
What is the nicest complement a Victory customer as ever told you about one of your homes?
This purchase has given us so much family enjoyment and freedom.
Your Definitive Guide to Leisure Lodges
Camping for the first time can seem like a daunting prospect but it needn’t be. All you need to do is be prepared! The following guide will help you get the best out of your trip.
The Tent:
If you’re new to camping you may be borrowing a tent, make sure you have all of the pieces if this is the case! Being short of pegs can be easily fixed, missing the inner lining not so much!
Select your spot carefully, check for any large or awkward rocks in the ground that could be uncomfortable to sleep on before pitching.
If you forget a mallet, to help with the pegs use the bottom of a tough shoe – such as a walking boot.
If you’re limited for space, prioritise bedding. Nothing will make or break your trip like a good nights sleep or lack of. Roll mats are useful, but a double-sided blanket with waterproof material underneath can be reused for picnics, the beach or outside of the tent in the day. Easy to dust off, they make for a great extra layer to sleep on. Also bring extra blankets, at night it can get very cold and these will double up for warmth or extra layers underneath.
If you prefer the idea of an air mattress, bring a puncture kit. Can’t find the hole? Place it in a bucket of water – where the air bubbles come out is where you’ll find your puncture.
If you’re a beginner, you’re probably camping in summer so you won’t need an expensive sleeping bag. A lightweight rectangular sleeping bag will do just fine. But don’t forget pillows!
Clothing:
Bring comfortable clothes that can be layered. Extra socks and jumpers are small things that will make a big difference if it gets cooler in the evening. Jeans are fine but can take a long time to dry if they get wet and aren’t the warmest material. Having a spare pair of leggings, tracksuit bottoms or shorts for when you get back to the tent will keep you comfortable even if there is a surprise downpour.
Cooking:
Check out what facilities are available at your campsite. Some will have BBQ areas or restaurants onsite. If you’re planning to use a camp stove for the majority of your trip, check out our top recipes.
Bring the basics like salt, pepper, butter/oil, teabags and UHT milk with you or pick up at a store nearby or onsite. A lemon is a great extra, the juice can be used to season food and keep salad from going limp! Camping cutlery and crockery can be metal or plastic, leave any china at home as it can be easily broken. Bowls are best as they catch any mess if you’re eating off knees, be it burgers or pasta! A set of mugs are also essential for cups of tea, soups or any drinks. To save packing too much, bring saucepans with a pouring lip as this will make for easy pouring and double up as a kettle for boiling water. Tupperware is also useful to keep food fresh or for saving any left overs for the next day.
Extra bits:
A torch will be very useful once things get a bit dark in the evening. A gas lighter is also good for any fires or BBQ’s without the risk of matches or short lighters.
If you’re short of space, microfibre towels are a great investment as they dry super quick and can be rolled up very small.
Ziplock bags: http://www.polybags.co.uk/shop/slidergrip-ziplock-bags_c105.htm
And there you have it, some basic tips to make sure your first camping trip goes as smoothly as possible!
Image via Pat David
Guide to Camping for Beginners
At Ladram we see all abilities of caravan tower; from the tentative amateur to the seasoned pro who backs his portable home up like a Devonshire farmer in the back lanes. The truth is, most sit somewhere in the middle of the two of the spectrums. As the old saying goes ‘practice makes perfect’, so let’s get things started with our A-Z guide for towing a caravan.
Is my vehicle up to the task?
If you’re towing with a new vehicle or caravan be sure to check the suitability for the task in hand. TowCar offers a great free vehicle/caravan matching tool which assesses the potential proficiency (stability rating, weight ratio, speed throughout gear changes, acceleration vs. gradients & maximum gradient advice) of your vehicle vs. your caravan.
Do I have the correct licence?
This is largely down to when you passed your driving test and it is YOUR responsibility to ensure you’re towing within the law.
Those who passed their driving test before Jan 1st 1997 are permitted to tow up to 8.25 tonnes (MAM – maximum authorised mass) until the expiry date stipulated on your licence.
The waters get muddier for drivers who passed the test after Jan 1st 1997, so lets start with the 3.5 tonne rule – this is an outline for the weight ration limit of caravans and other towing devices. Category B vehicles can carry up to 8 passengers with a MAM of up to 3.5 tonnes (3,500kg). Such vehicles can tow a trailer over 0.75 tonnes (750kg), providing the MAM of the trailer doesn’t exceed the unladen weight of the vehicle and combined they do not exceed 3.5 tonnes.
The trailer’s weight cannot exceed the unladen weight of the car towing it, to put this into perspective a typically trailer tent (unbraked) weighs around 500 kg, while very small caravans weigh in from about 650 kg – but I mean small. These CAN therefore be towed by the average family car such as a Ford Focus 1.6 (1,340kg) – as it’s designed to tow up to 670 kg (unbraked) & 1000 kg (braked). Always bare in mind the MAM of the trailer is key and not its unladen weight.
The B+E Licence
Typically a medium sized caravan will weigh in around the 1300 kg mark and yet again if you passed your test after 1st Jan 1997 you will need an additional test (practical only) to be fully tow legal, this is known as a B+E licence. This will enable you to tow weights over 750 kg & operate of vehicle up to 3.5 tons (3,500 kg)
Under the B+E license there is no limit on the weight ratio of your vehicle & caravan combination, however you should not tow something that exceeds the stipulated weight limit of your vehicle. To find your vehicle’s tow limit click here.
How to weigh your Caravan?
Using one of the UK’s many public weighbridges, many are free but some do charge up to £15 depending on location. Click here to see a list of weighbridges operating in the UK.
– Weigh your vehicle and caravan at its legal minimal weight (ie no luggage).
– Petrol in your car’s tank can weigh anything up to 60 kg, weighing with a full tank is advised.
Step 1: Drive onto the weighbridge with all wheels (including caravan) on the scales, then apply the car/ caravan handbrake before lowering the jockey wheel so that it makes contact with the weighbridge platform. Take measurement.
Step 2: Drive onto the platform with just the caravan wheels remaining on the platform, apply the handbrake and lower the jockey wheel so that it makes contact with the platform, then uncouple the caravan from the vehicle. Take second measurement.
Step 3: Go and collect your printed certificate from the weighbridges office.
Planning your Route
We know the East Devon back lanes like the back of our hand – and their potential pitfalls. Be sure to plan your departing and returning journeys, ensuring you only stick to roads that you (a) feel comfortable driving on & (b) are safe to do so. The guys a Michelin, know a thing or two about getting from A – B and have put together this great route planner that is caravan considerate, with alerts for steep hills and tight bends. Just remember to allow plenty of time to reach your destination, especially if you want to avoid reversing to your pitch in darkness.
The Caravan Reversing Guide:
Even the most diligently route planned won’t have a ‘reverse avoidance’ option, you’ll need to learn the basic manoeuvres.
When you reverse your caravan it will feel like it’s initially resisting, before making that familiar clunking sound, this is simply the caravan’s auto-reverse feature – it’s way of telling you whether its going to follow your lead.
Single Axle vs. Twin Axle
Whether your caravan is large or small, the principles are the same, however size does affect the way a caravan reacts. Single axle caravans have the ability to pivot on the wheel enabling them to turn sharply, but also jackknife more easily. The lesser the distance between the caravans axle and your vehicles towball, the quicker the response to changes made on the steering wheel. Twin axle vans might be visually more intimidating, however they do not pivot on the wheels and respond more slowly when reversed, subsequently making them easier to control.
Reverse Straight
Before popping your vehicle into reverse ensure your caravan and vehicle are straight, including the steering wheel. As you begin to move back keep a close eye on the caravan in your mirrors, if the caravan is getting bigger in one mirror move the steering wheel down towards that mirror – a ¼ turn MAX! Once the van returns to its original position (equal in both mirrors) simply return the steering wheel back to its straight positioning.
Reversing Around Corners
In camping terms this mean reversing onto your pitch and it will require you to be correctly positioned from the start in order to completed successfully.
Step 1: Drive past your pitch with your caravan’s rear wheels setting at perpendicular (90º) to the edge of your pitch.
Step 2: Now turn your steering wheel 1 full rotation in the opposite direction from you wish to turn.
Step 3: Start reversing slowly and your caravan will begin to pivot pretty quickly, but keep an eye on it as if you reverse too far (in the procedure laid out in step 2) you will jack-knife. Before the caravan is aligned straight against the pitch (45º), turn the steering wheel in the opposite direction so that your vehicle would be in the same position as the caravan were you reversing solo.
If the caravan moves too far (or not enough) during this process simply straighten up and start again. Bare in mind you can push your caravan to straighten it up once unhitched, so you don’t need to be inch perfect.
Towing on the Roads
Treat towing a caravan like you would driving a car in the wet, give yourself more time! You’ll need to brake earlier and accelerate more sympathetically.
By law, towing vehicles cannot exceed 50 mph on single carriageways and 60 mph on dual carriageways.
On motorways, towing vehicles are not permitted to use the outer land unless instructed to do so, such as a traffic jam or accident.
Mirrors
Ensure that you have view visibility of your caravan, this likely means fitting extension mirrors to your vehicle. Once on holiday don’t forget to remove them when not hitched up, it’s actually illegal to use them when not required as they are potentially dangerous to pedestrians and cyclists.
Miscellaneous Checklist: Dos & Don’ts
Do make a checklist of all required essentials before going on your next caravan holiday.
Do let traffic pass you if you are causing a traffic jam, it will cost you 30 seconds and save others a lot more than that.
Do take extra care when overtaking lorries or coaches as air turbulences can cause snakking – even with electronic and friction stabilisers fitted to your caravan.
Do check that all lights on your caravans rear panel are working.
Do disconnect your 12v system if you are not unhitching your caravan (think 1 night stays), this removes any chance of you draining your car battery.
Do clean your caravan after your holiday, clean out your fridge with an Anti-Bac spray and keep the fridge door open until next year.
Do check your caravan’s roof hatch is property closed during journeys.
Don’t carry passengers in a caravan while towing, it’s illegal in the UK.
Technically pets can be transported in a moving caravan, however it is not recommended and may cause unnecessary stress on your beloved pet.
Don’t use a homemade cardboard number plates, any number plate on your caravan must conform to an approved British Standard
Don’t forget 4 wooden blocks to stabilize your caravan with.
Don’t park your caravan in parking bays with meters.
Don’t instinctively brake if your caravan begins to sway, instead use engine braking to reduce speed gradually.
Image via the Highways Agency on Flickr
The A-Z of Towing a Caravan
Camping holidays can be a great way to embrace the outdoors, be at one with nature and bond with your family; but while it’s the campers’ dream to leave behind work, daily routines and creature comforts, some diligent preparation will make that summer getaway all the more enjoyable.
We’ve collated our top 10 most useful camping hacks, so you won’t need to learn from your own mistakes:
Try placing rosemary over your BBQs coals just before the meat goes on, you’ll add flavour to the meat and your clothes will smell better too!
Strap your head torch to an empty milk carton to create a lantern in your tent.
Save weight and backpack space by using antibiotics packs instead of tubes of full; toothpaste, moisturizer, hair gel and pretty much anything else you wish to bring, with the exception of aftershave .
You don’t need to bring speakers camping, just use a phone in a ceramic mug and you’ll have amplified sound – just be sure not to disturb any neighbouring campers.
Being bitten on BBQ duty? Simply throw some sage on the coals every now and then to help keep them at bay, but don’t burn all your sage as you might need to for cooking.
Save your old packs of tic tacs, they make great spice storage whilst camping.
If the British weather is making your camping trip a tad cold, try sleeping with your clothes for the next day in your sleeping bag, we can promise they will be crease-free, but they’ll be warm.
If rain is hampering lighting your BBQ, try using Doritos as kindling as they make a great substitute for firelighters, whilst encouraging healthier eating!
We hope you won’t need to wear gloves whilst camping at Ladram, but if you do try attaching a keyring around your tents zips for easier access & less gloves on/gloves off.
If you’re using matches whilst ensure you buy strike-anywhere matches, then in order to British weather proof them, dip the sulphur end in wax and store in a water-tight prescription bottle.
At Ladram Bay we love camping and have done so for 80 years and counting, but you’re still going to need to set up your own tent!
If you’re new to the world of pegs, poles and guy ropes then we’re here to offer a helping hand in setting up your portable second home and put some pride into pitching.
The Tent…
Failure to prepare is preparing to fail, if you’ve never pitched a tent or have bought a new design, try pitching at home before you go on holiday. It may sound obvious but being able to put everything back in the original bag will make that journey home all the more enjoyable, spacious and give you camping kudos amongst your temporary neighbours.
What type of Tent?
If you’ve about to buy a tent watch an online demo or ask for a demo in store, then work out how easily your family will fit in. The tent you’re about to buy might be in a great colour and can be pitched halfway up K2, but if your struggle to piece it together and your dog is sleeping on your feet you’re in for a long holiday.
Flat Ground
Few campsites are likely to be offering pitches at 45* angles, but if your pitch isn’t totally flat ensure you pitch your tent with your feet facing downwards and the door facing downhill, this way your companions won’t roll into each other, blood won’t rush to your head while you sleep and rain won’t come in via the entrance. Lastly, the tent’s main door should be facing away from the wind (particularly if using a tunnel tent) to avoid buffering.
The Pitch
Keen campers always take care to find the perfect spot, book in advance to secure the a pitch that fulfils your family’s requirements be it the view, distance to amenities or private beach.
Setting Up Camping
You’ve been shown to your pitch, now it time to check for any object that may damage your tent, such as tent pegs or mislaid cooking utensils left by previous campers. Most modern tents have sewn in groundsheets, try pegging out the corners of this first to establish a basic layout – just be sure not to peg it out too tight. Pegs should be knocked in at a 45 degree angle, with the tip pointing towards the tent. Drive in with a rubber mallet for a smooth pitching experience – unless your are using screw in pegs. Guylines are a great way to give your tent added rigidity, especially in exposed positions.
Near the loos or far away?
Being near the loos or amenities are a big no no for some people, but for others (especially those with young children) it can mean far shorter midnight trips across the campsite. Ask yourself what campsite facility am I likely to be using most and would it help being nearby to it?
Where the children play?
For families, being nearby or able to watch your children play from your own tent is prerequisite, look at where your kids are likely to be playing and book a pitch with this in mind.
Gimme Shelter
Windbreaks are a campers way of giving yourself a little bit of privacy, but its worth remembering that hedgerows can provide great wind protection, especially from an exposed coastal position like Ladram’s.
Trees: Friend or Foe?
To the novice camper tree offer shade, a rain buffer, a point of orientation and a subtle nod to embracing the great outdoors, however as seasoned campers will testify the grass beneath will get less rain (patchy grass), when it does rain water will drip from trees long after the rain has stopped, trees will drip sap on your tent and birds roosting above may (unintentionally) defecate on your second home.
Looking forward to a family camping trip? Think you’ve got everything you might need? Use Ladram Bay’s camping checklist just to be sure…
The Tent:
Mallet – for hitting the tent pegs into place
Pillows/quilts/blankets – for comfort and warmth
Pump – for blowing up air-beds or inflatable mattresses
Torch – for lighting the way to the toilet block at night!
Lamps – for some light in the tent
Fold-up chairs – for evenings outside or soaking up some sun
Cooking:
Stove/BBQ – whatever you’re planning to use to cook make sure you have the necessary gas, lighters etc.
Washing-up liquid & sponge – and a bowl, though you can wash up directly in the sink
Pans – make sure one has a pouring lip as its much easier to pour water or sauces
Can opener/corkscrew – Always useful!
Comprehensive cutlery – including a sharp knife
Crockery – Bowls, plates, mugs & plastic cups
Cool box – for storing milk, drinks or food in
Any food you may need/want for the journey or upon arrival just in case the shop is shut!
Toiletries:
The basics – don’t forget your shampoo/conditioner and shower gel
Toothbrushes & toothpaste – you’d be surprised how often these are left behind
Toilet roll – though most campsites supply it, you can never be too sure!
Insect repellent – keep mosquitoes and other nasties away
Antiseptic wet wipes – for feeling clean after a day on site
SPF! You never know when the sun might pop out and burning can happen on long walks as well as the beach!
Washing powder/tablets & pegs – check if there is an area onsite, if not bring a bowl!
First Aid kit – plasters, painkillers and antihistamines
Towels – take as many as you can, microfibre towels are great for quick drying
Clothing:
Pyjamas & spare layers – for extra warmth at night
Swimwear – wetsuits if boarding, dry robes and hoodies for the beach if things cool off
Plenty of warm, waterproof clothing – even in the summer
Trainers or comfortable walking shoes
Wellington boots – great to throw on around the campsite when flip flops aren’t an option or for country walks that might be a bit muddy!
Toys:
Buckets and spades – of course
In-tent entertainment – think board games, a deck of cards and books. Camping essentials!
Check if there are any events on site, such as fancy dress
Other Necessities:
Matches & batteries – just in case!
Bottled water
Cash
Mobile phone charger, car charger is useful too if you don’t have access to electricity!
Map of the area or region – any places you might want to visit
Pets – if you’re bringing a dog then don’t forget:
Lead
Water bowl
Pet food
Food bowl
Spare towels
Dog bed
Any medicines if needed
Vet’s number just in case!
Camping Equipment Checklist
